A simple job with GLITE 3.1.x
About the job itself
A simple job will be created and sent to the GRID in order to show the working principle. Details on each step will be described in other documents.
The simple job does the following:
The file file1.txt should be written a specified number of times (e.g. 4) to the output.
The executable and the parameters
Write a text file with a short text of your choice and call it file1.txt.
Write a shell script test.sh with the following content:
#!/bin/sh
echo "Starting at" `date` "on" `hostname`
J=1
while [ $J -lt $2 ] ;
do
cat $1
done
echo "Finished at" `date`
$1 is the placeholder for the first parameter, $2 for the second parameter.
Make the file executable: chmod +x test.sh
The Job Description Language
Next step is to create the file containing the job definitions. Create a file called test.jdl including the following lines:
Executable = "test.sh";
Arguments = "file1.txt 5";
StdOutput = "test.out";
StdError = "test.err";
InputSandbox = {"./test.sh", "./file1.txt"};
OutputSandbox = {"test.out", "test.err"};
MyProxyServer = "agrid.uibk.ac.at";
The lines will be described shortly.
- Line 1: Name of the program to execute
- Line 2: Arguments in the right order. The first one will be used called with $1 in the program, the second one with $2.
- Line 3: File, where the output will be written. If you execute a program without giving this filename, the standard output is the screen.
- Line 4: File, where the error will be written.
- Line 5: Files that will be sent to the computing element.
- Line 6: Files that you will retrieve as output on your user interface.
- Line 7: This line is only needed, if your job lasts longer than your proxy. Replace agrid.uibk.ac.at by your myproxy-Server. Before submitting the job, create a myproxy on the specified server.
Submitting the job and checking its status
Attention! The commands glite-job-* were used in the past to manage jobs in the gLite WMS submitted via Network Server. These commands are obsolete and are not part of the User Interface any longer.
Create a myproxy if needed. Create a proxy by typing one of the two commands :
$ grid-proxy-init
$ voms-proxy-init -voms voce
For more information on the proxies check the different proxies page.Submit the job and store JobID in the file joblist.
$ glite-wms-job-submit -vo voce -o joblist test.jdl

You can omit -vo voce, if you specify the virtual organisation in the jdl-file or by creating a voms-proxy.
Check the job status:
$ glite-wms-job-status -i joblist

If your have more than one job in your joblist, you have to give the number of the job you want to check or press enter and all jobs-statuses will be displayed.
The order of the statuses are: submitted - waiting - ready - scheduled - running - done - cleared.
As soon as the status is Done, you can retrieve the output.
Retrieving the output
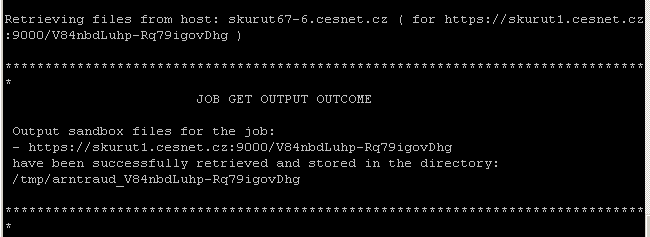
For retrieving the output type the command:
$ glite-wms-job-output -i joblist

Copy the output to your directory and have fun!
After you have retrieved the output the status of the job is set to Cleared.


